To understand a programming language it is useful to understand the abstract syntax tree. So this is also an option: You can create the class from scratch with AST, or almost from scratch since the type definition is generated with a basic JETemplate.
You start with calling the wizard File->New->Other...->Java->Java Code Generation. With
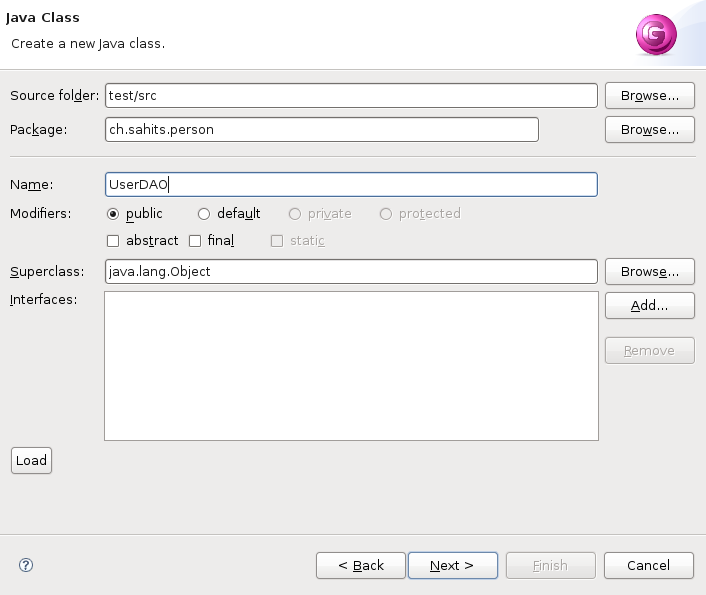
the first page of the wizard you may be familiar since it is basicly
identical with the Java class wizard although some elements are missing
that are not needed here. If you had the focus on a project with a
source folder this Source folder is already inserted. The same is true
for the package. Supply the needed elements.
Proceed to the second page with "Next".
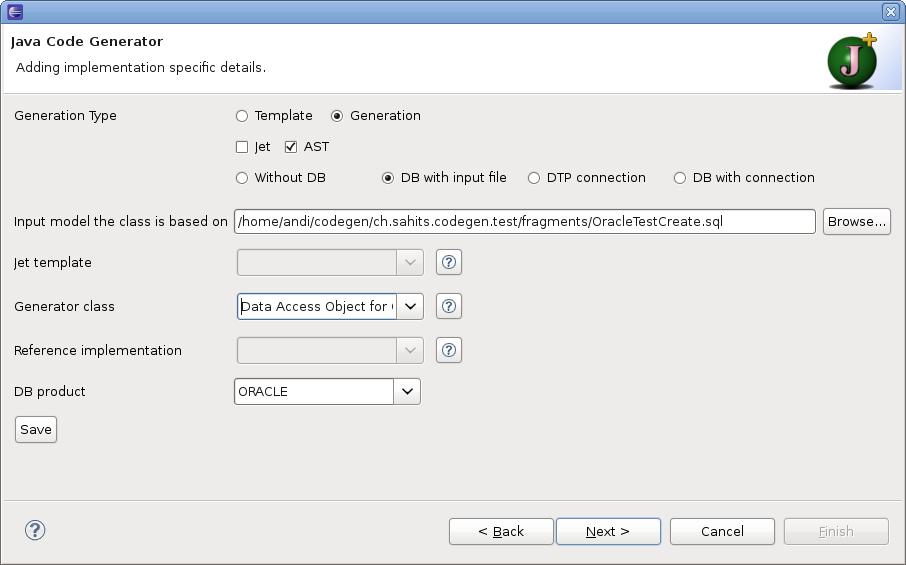
On the second page in the first section you specify the way to generate the code. For the generation with AST you swap the radio button to "Generation" and check the checkbox AST and uncheck the checkbox JET. Generation states that the code is generated from scratch. AST in the second row indicates that the code generation is done solely with AST. The generator class (PureASTOracleDAOGenerator) must implement the interface IPureASTGenerator. The third row tells something about the input model. With "DB with input file" you specify the input model through an input file.
Now you have to specify the other needed input fields. As an
"Data Input" file we choose the SQL
create script for an USER table. As you checked the AST box you must supply
a generator class that handles the generation of the code with AST.
Since the create script is for an
Oracle table we choose the Oracle database product.
As you choose the option "DB with input file" the third page is basicly optional. Though the choosen generator class implements the interface IDBAccess, which indicates that DB access information are needed for complete file generation.
Proceed to the second page with "Next".
Specifiy the needed values
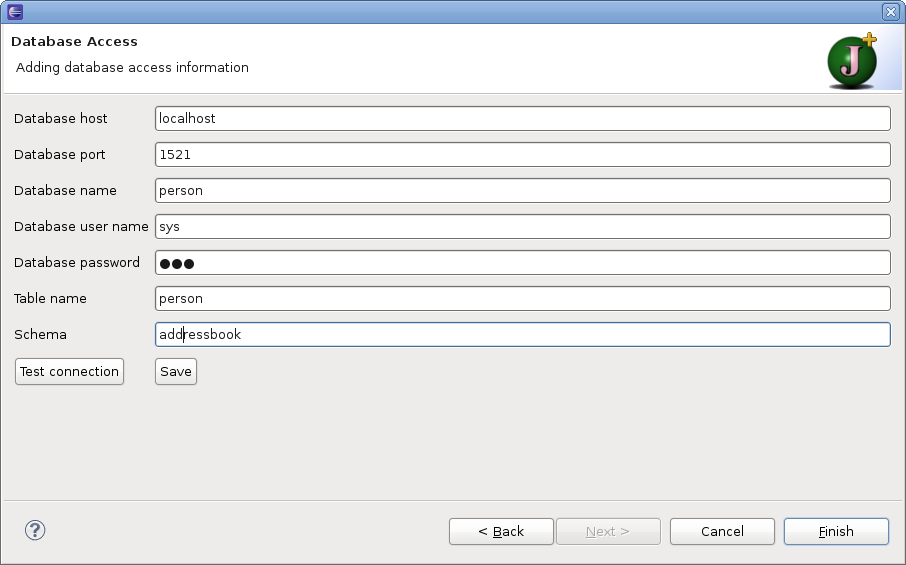
Since you don't need the connection to retrieve the table structure you can proceed without testing. Hit "Finish" to complete the process.
This produces the following code:
package ch.sahits.person;

import java.sql.Connection;
import java.sql.DriverManager;
import java.sql.ResultSet;
import java.sql.SQLException;
import java.sql.Statement;
import java.util.Vector;


public class UserDAO  {

	private Connection getConnection() throws SQLException {
		Connection con = null;
		try {
			Class.forName("oracle.jdbc.driver.OracleDriver");
		} catch (ClassNotFoundException ex) {
			System.err
					.println("Class oracle.jdbc.driver.OracleDriver not found. Make sure that classes12.jar is on your classpath");
		}
		con = DriverManager.getConnection(
				"jdbc:oracle:thin:@localhost:1521:person", "sys", "1234567");
		return con;
	}

	public UserBean[] loadAll() throws SQLException {
		String sql = "select * from USER";
		Connection con = getConnection();
		Statement stmt = con.createStatement();
		ResultSet result = stmt.executeQuery(sql);
		result.beforeFirst();
		Vector<UserBean> v = new Vector<UserBean>();
		while (result.next()) {
			UserBean obj = new UserBean();
			obj.setName(result.getString("NAME").trim());
			obj.setSurname(result.getString("SURNAME").trim());
			obj.setEmail(result.getString("EMAIL").trim());
			obj.setBitrhDate(result.getString("BITRH_DATE").trim());
			v.add(obj);
		}
		UserBean[] array = new UserBean[v.size()];
		v.copyInto(array);
		return array;
	}

	public UserBean loadUnique(String email) throws SQLException {
		String sql = "select * from USER where " + "EMAIL = `" + email + "`";
		Connection con = getConnection();
		Statement stmt = con.createStatement();
		ResultSet result = stmt.executeQuery(sql);
		result.beforeFirst();
		if (result.next()) {
			UserBean obj = new UserBean();
			obj.setName(result.getString("NAME").trim());
			obj.setSurname(result.getString("SURNAME").trim());
			obj.setEmail(result.getString("EMAIL").trim());
			obj.setBitrhDate(result.getString("BITRH_DATE").trim());
			return obj;
		}
		return null;
	}

}
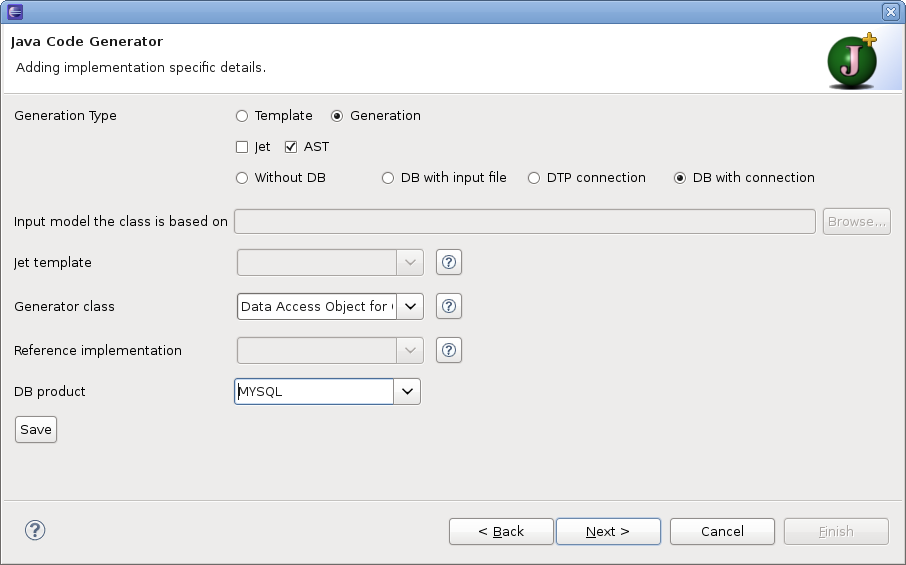
The same result can be achieved (at least if you have the same
structure defined) with option "DB with connection" indicating that the
structural information on the table is retrieved through the database
connection. Now you must not specify a "Data Input" file. The Jet
template and DB product are still needed. Note that for the generation
with a connection only a MySQL database is supported (in version 0.9.3).
Other database products can be added though extension.
Now you must proceed with Next to the third page to supply the
data needed for the connection. Host, port and user name are already
supplied with sensible values. Add the database name, password and table
name.
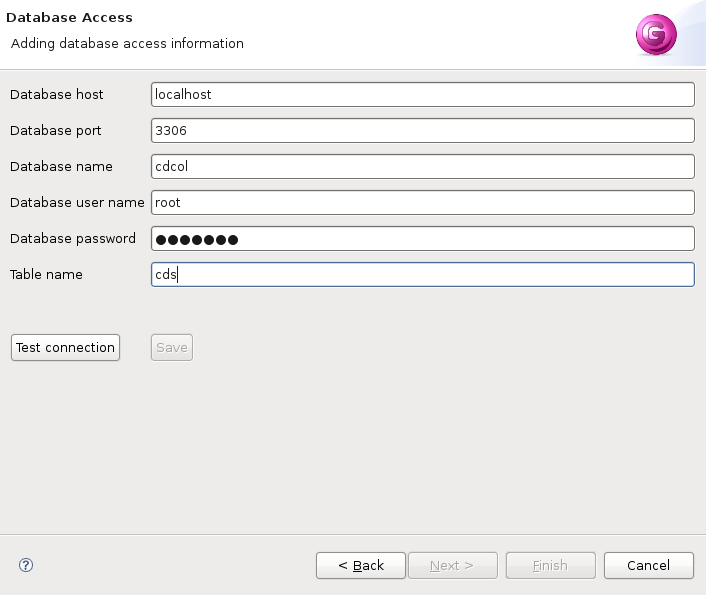
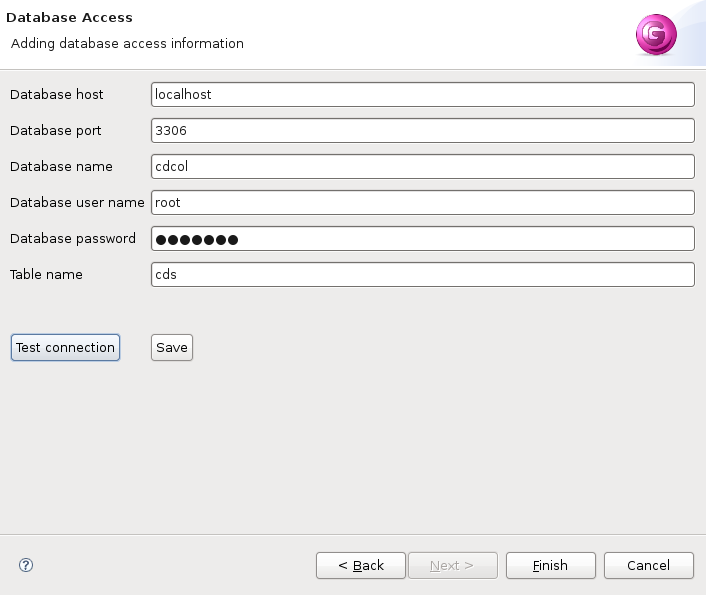
Before you can finish you must verify that the connection data is
valid by hitting the button Test connection.
This Project is hosted at:
Last modified: